
As Friedcircuits grows, the need to produce more at once increases. Before making the OLED backpacks I was hand soldering each product. During the development and fundraiser stages, I figured it would be a good idea to look into a better way to manufacture them. After researching and talking to a few people, I decided to go with a custom-built reflow oven. Well, really, it’s a converted toaster oven, just modified to suit my needs. I used resources from across the Web that I’d like to bring together in one post as well as my experience.
Reflow Oven
Parts
Arduino Shield PID Controller from RocketScream
9V power supply or USB cable connected to a 5V USB power supply like from a smartphone. You can also power it from your laptop.
Type K Thermocoupler from Sparkfun (or Adafruit)
D2425 Crydom Solid State Relays w/heatsink – I got a good deal on eBay but DigiKey sells them as well. I am only using one at the moment.
Black & Decker 1500W Toaster Oven from Target (Can’t find on their site but it is in store)
3 Prong extension cable from Target
Aluminum Foil
Project Box from RadioShack – For low voltage parts
Cardboard box or another project box – For high voltage relays
STSP Monmentary Push buttom from radioshack (I had this one already, you can use what you have)
LED Holder from RadioShack (This is for 5mm but you could hot glue a 3mm in there too)
3-5mm RED LED.
The Build
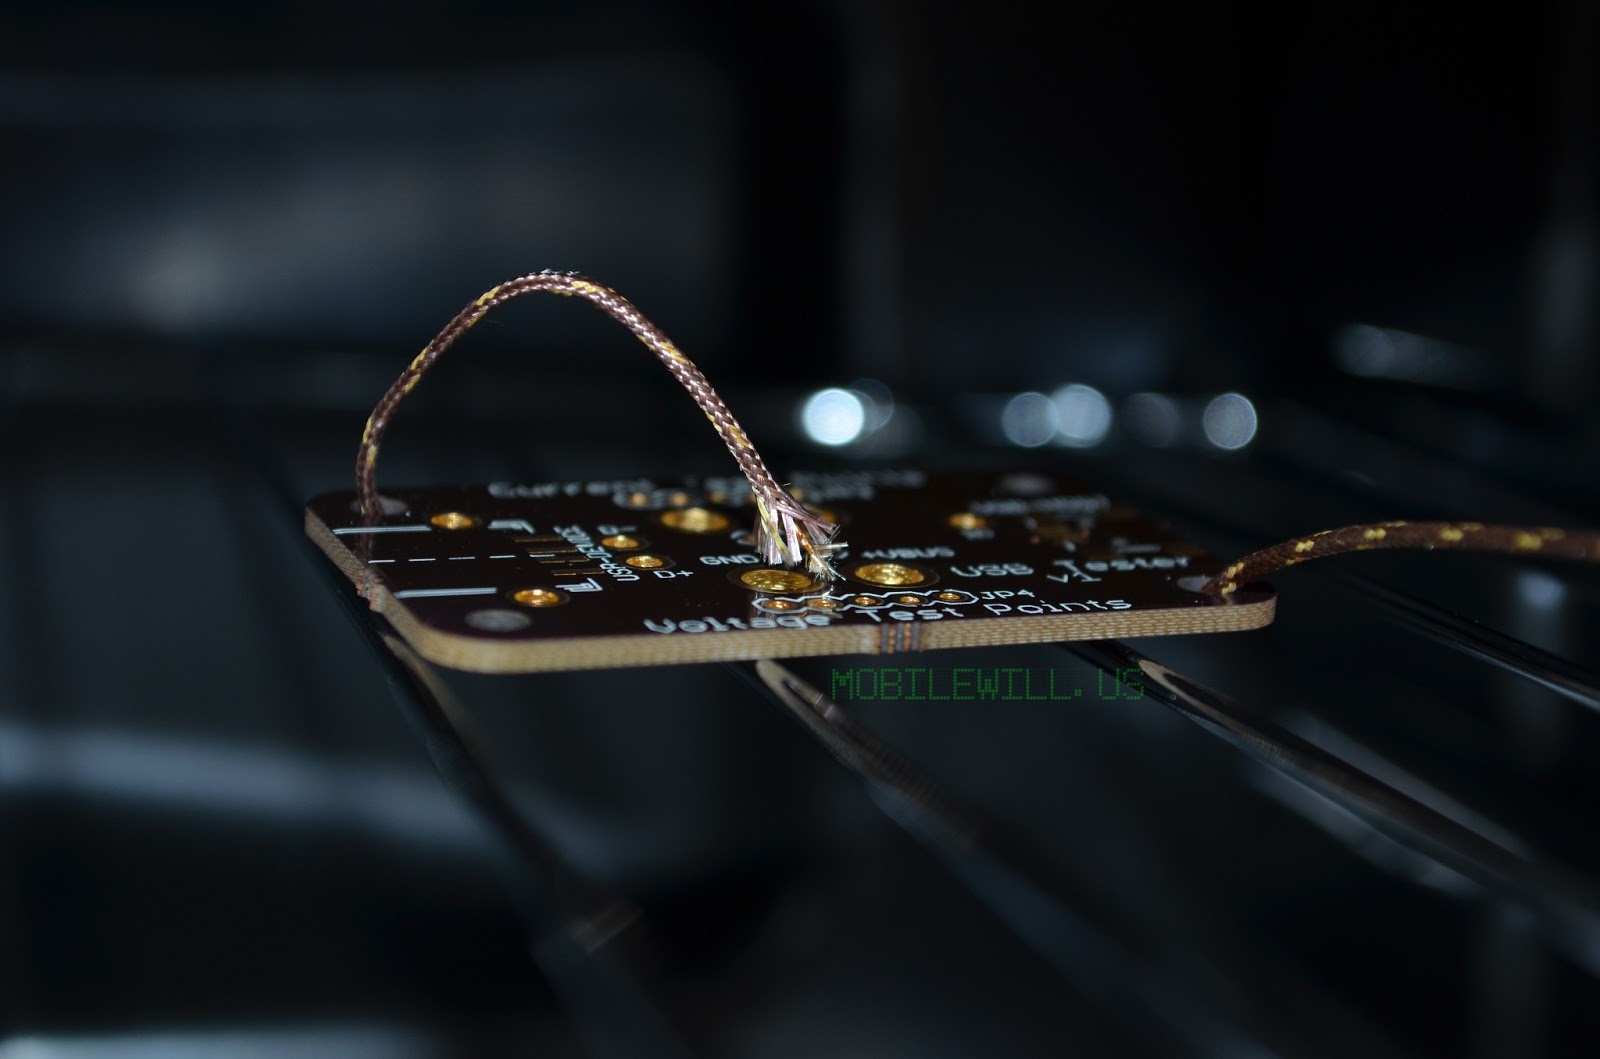 |
| Scrap PCB for temperature monitoring |
My findings:
- The fan seems to slow down the heating speed.
- Broil shuts off the fan and only uses the top elements.
- A lot of heat is lost through the front glass, sides and bottom.
- The first few heat cycles are smelly and smoky, probably due to packing oil burn-off.
- The top elements are higher wattage than bottom
- The PCB heats up faster with the rack closer to the top element
Putting it all together:
Note: The best settings I have found for reflow is to set the temperature knob to the max heat setting just before broil and set the timer to stay on. Once set, you don’t have to adjust them again. The SSR and microcontroller will do all the work for you.
Speed up heating
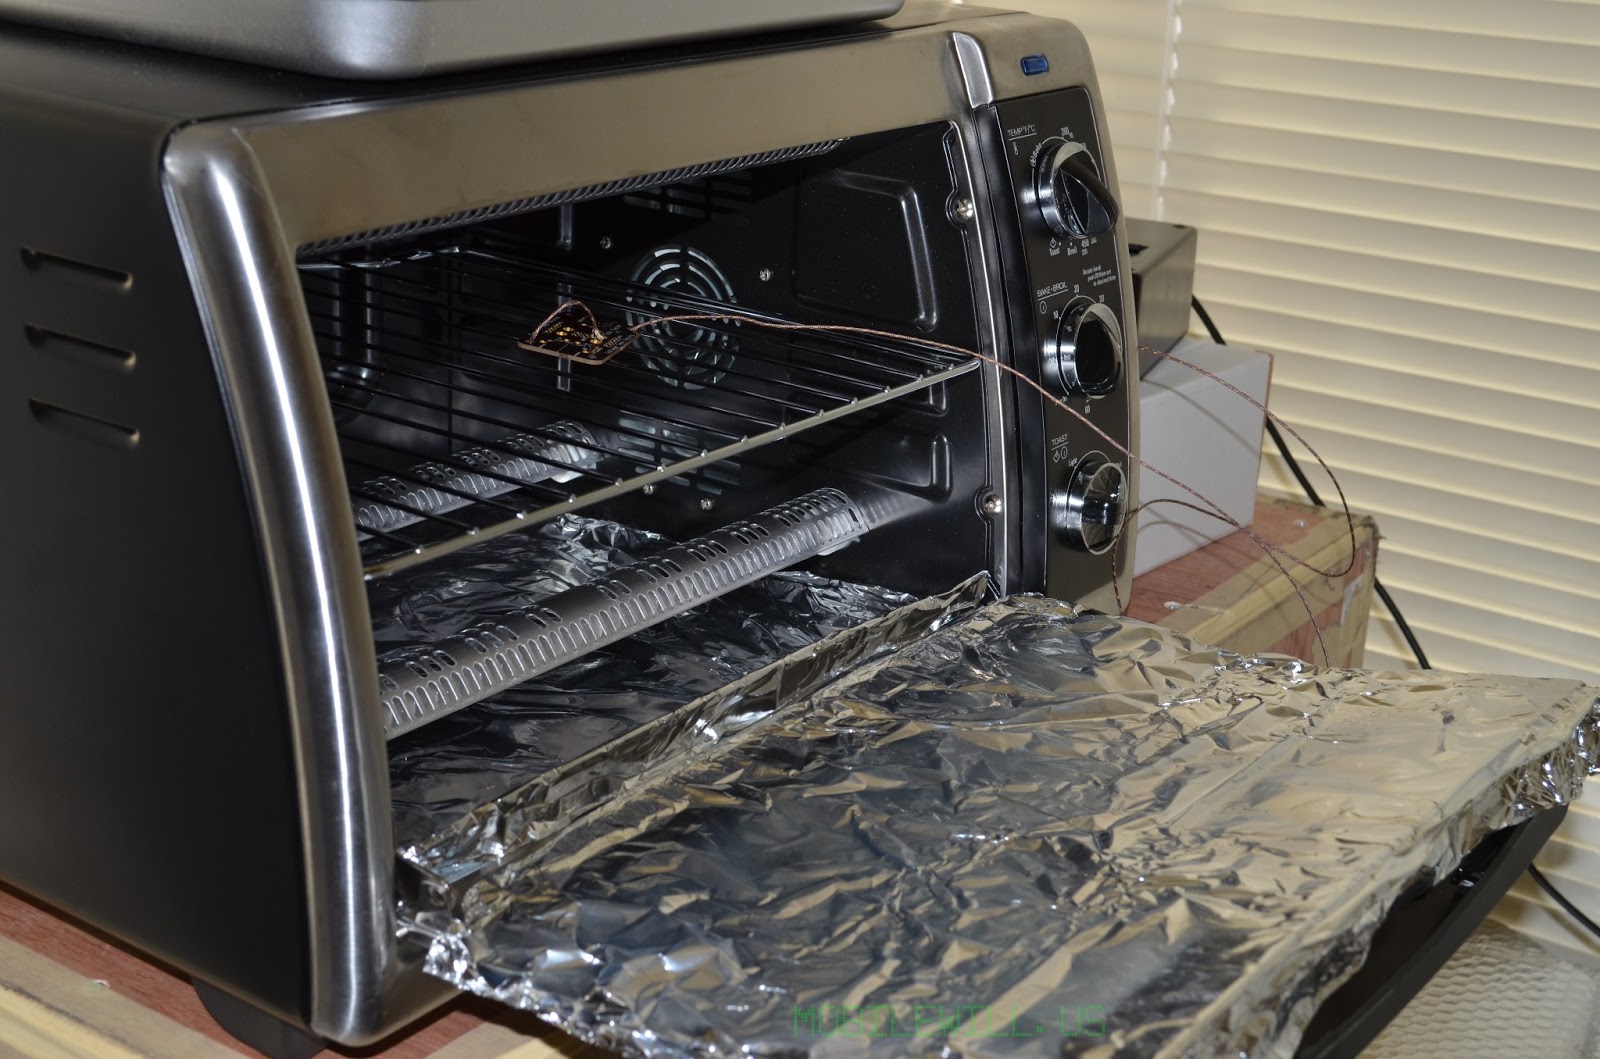 |
| Toaster reflow oven with foil |
 |
| Toaster reflow oven with foil |
Enclosure – Low Voltage
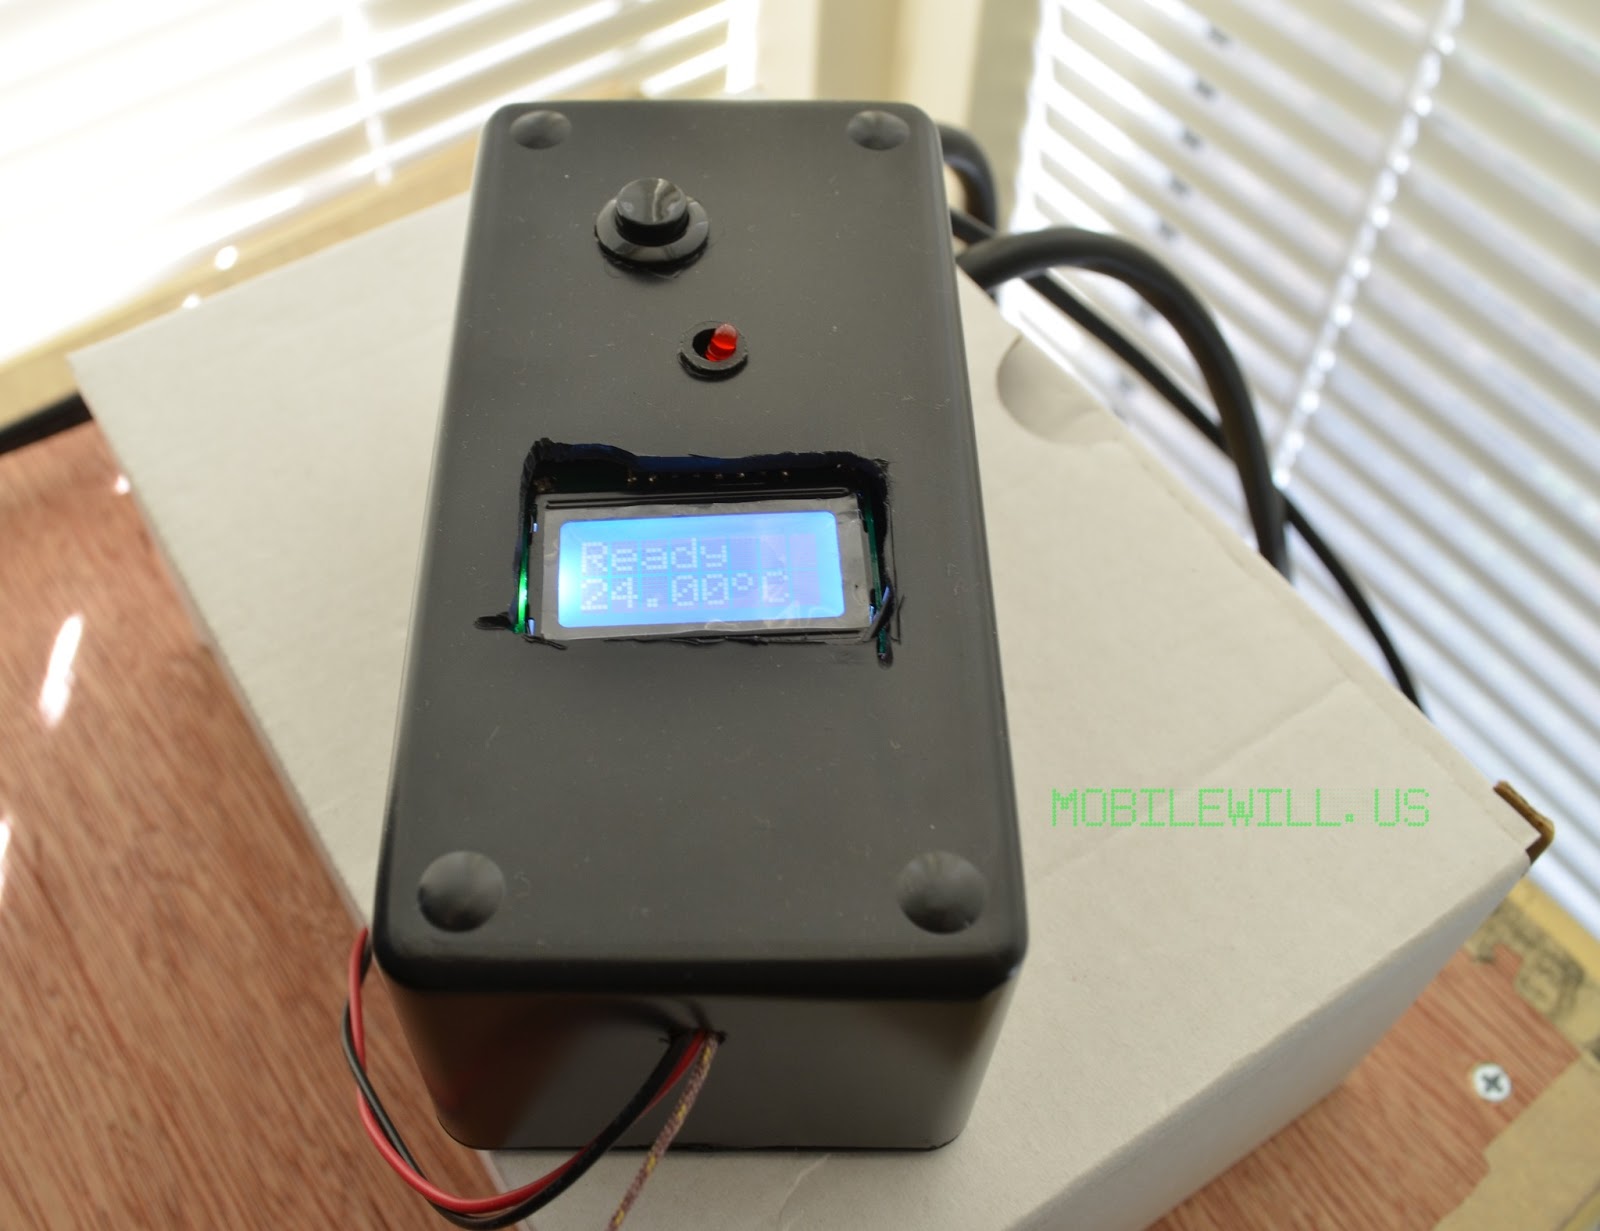 |
| PID LCD display |
Using a regular drill I cut holes for the LED, button and one hole on one side for low voltage power and control lines for the SSR and the other side for power and USB.
 |
| PID hole for thermocouple and SSR control |
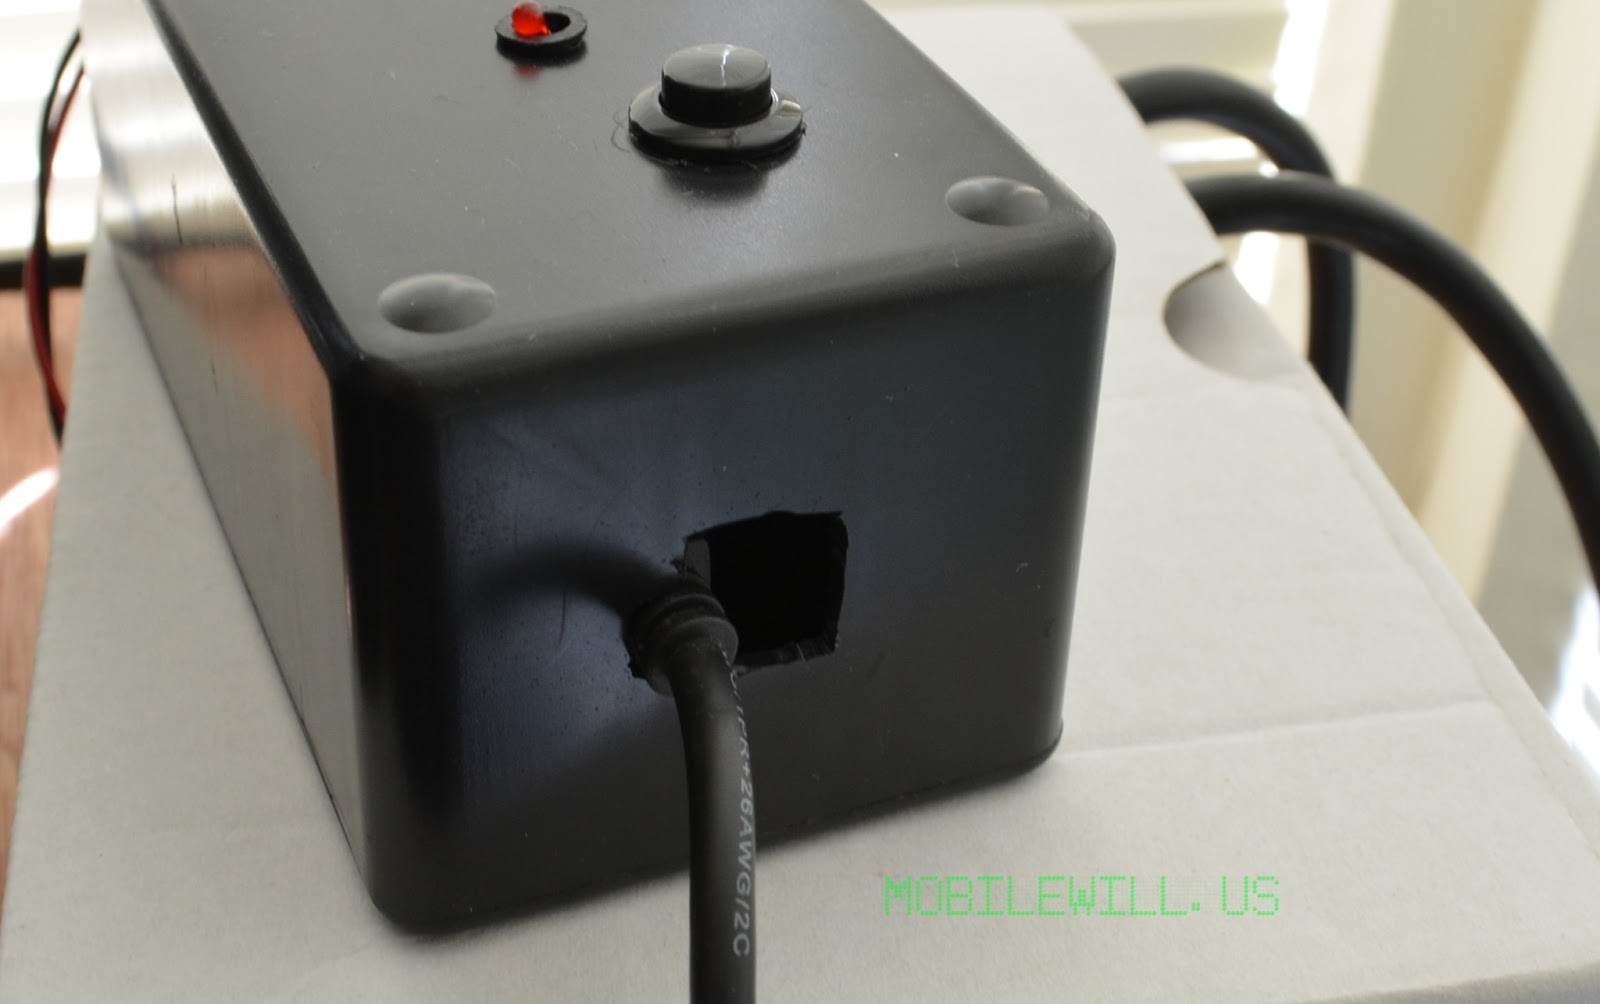 |
| PID PowerUSB hole |
Once everything was inside and connected I could test the low voltage electronics. Turned it on and saw the temperature reading on the LCD. Finally we need to test the SSR. I spliced into the middle of the extension cord but realized later I should of spliced closer to the toaster oven side. Oh well, easily fixed by another extension cord.
 |
| PID Controller open on top of high voltage box with SSR |
The high voltage goes in one side of the box (seen below) and the low voltage on the other (seen above). Once connected we can hit the button and see if the toaster oven turns on. If so we are ready to close it up. Since the height of the enclosure is more than the controller I used some folded cardboard to act like a spring to fill the gap. I only used two screws to close the case, in case I need to open it again.
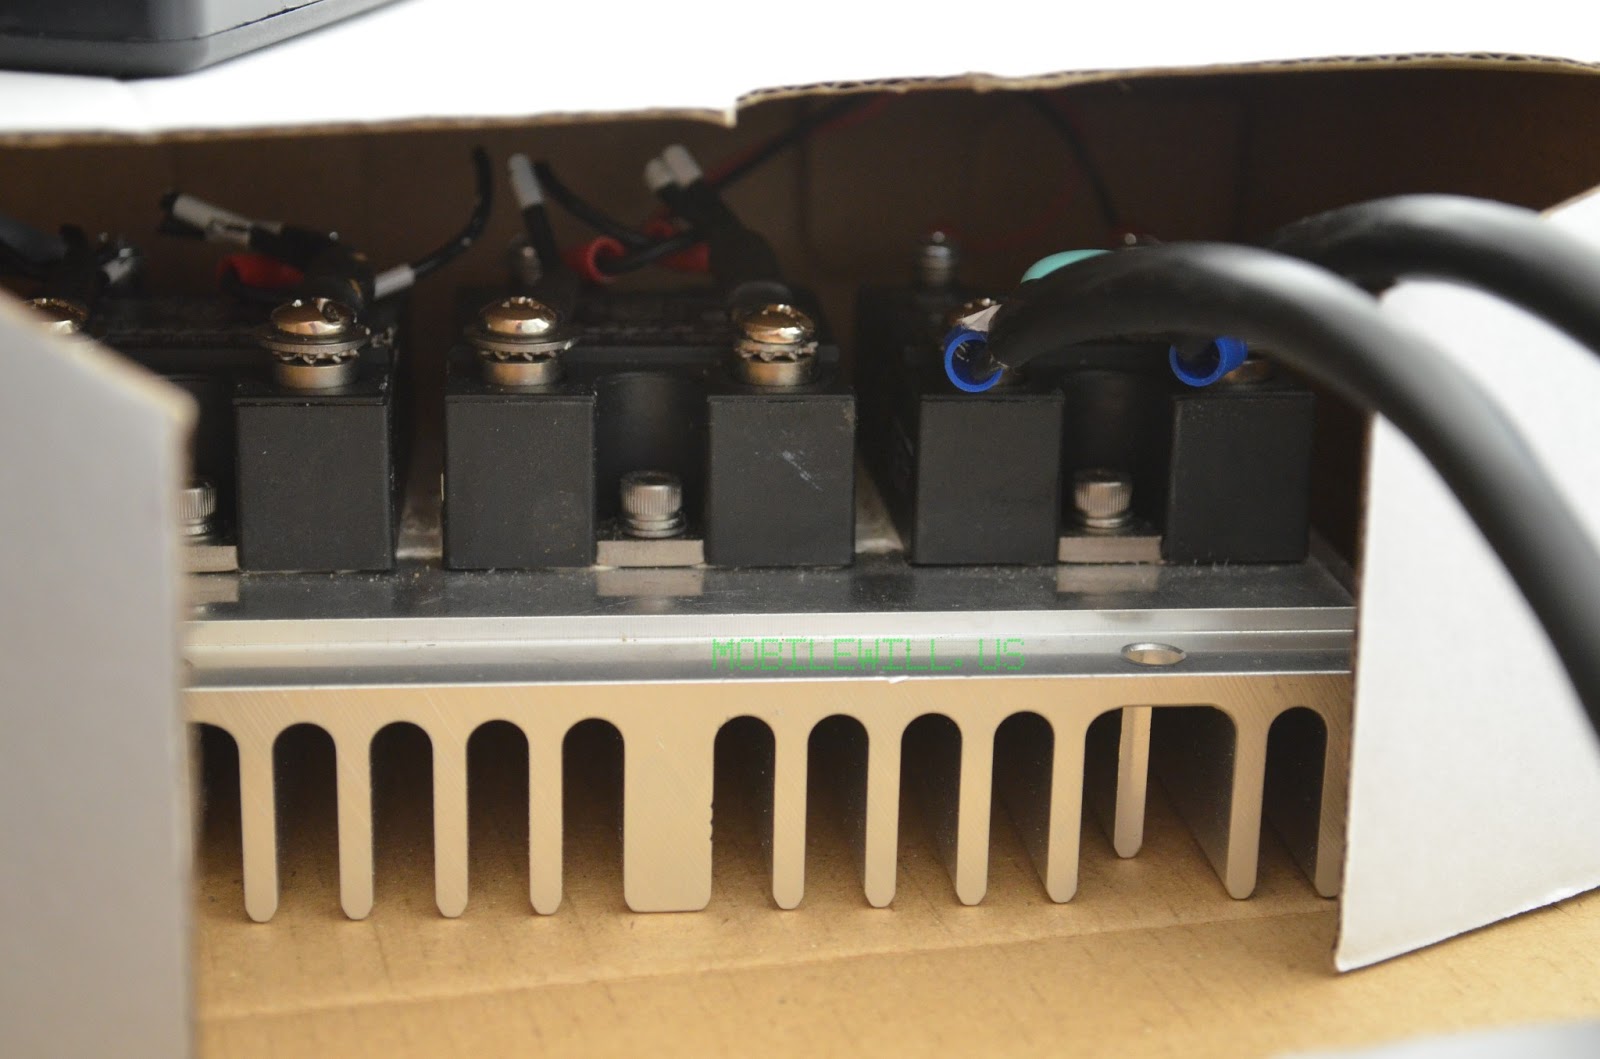 |
| SSR in high voltage box, only one is in use |
Now it’s time to test it out through an entire reflow process. Once it gets to the cooling stage and it starts to drop a few degrees, I usually open the door just a tad to speed up cooling. If it cools off too fast the controller will apply some heat. You can use the door to control the cool down speed. The max should be 6C/per second but double check your datasheet for the solder paste you are using. I find even with the door open it is hard to reach that cool down speed.
In part two we will look at framing, stencils and applying solder paste to the PCB. Then we can reflow it in the toaster reflow oven and make professional looking PCBs at home.
Comments 7
Maybe you can hook up the fan again and have it controlled with a spare relay and only have it running in the cooling stage. That should help increase the cooling rate.
Thats a good idea. Just may have to have it speed controlled because I tried speeding up cooling by waving my hand and the element kicked on to slow down cooling.
I don't know how easy the code is to modify, but maybe you can change it up so if the toaster temp is higher than needed, the fan turns on and if it is lower, the heating element turns on. With this PID-controlled, it should keep the temperature profile pretty well.
I will take a look and see what it will take. Speeding up cooling to the max would be helpful.
Will, glad that it's finally up!
Based on my experiments, I would skip the fan.
And instead of using the fan to cool down, use a servo motor to slowly open the door!
That's a pretty smart idea. I'm sure that would significantly drop the temperature.
I want to try that, for now I just get up and open the door, if I remember, :). I should set a beep to remind me to get up. At least till I get a servo going.