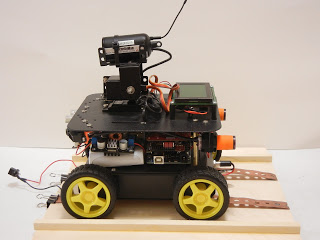
After my project was posted on Hack A Day I realized I don’t have pictures of the completed build. Of course it goes it without saying that it is really never completed. Who knows what we will be added in the next year or two?
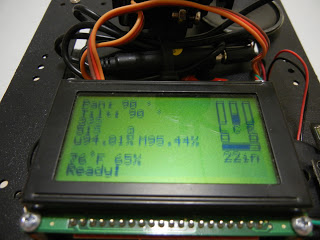
Sensor ouput on LCD
Right: distance sensors and brightness across the bottom.
Left: camera angles and battery levels.
Bottom: temperature and humidity followed but the last spoken text.
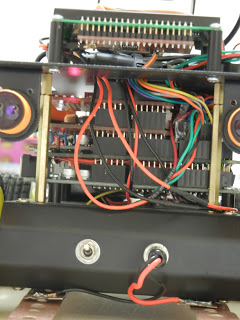
View from the rear which includes the IR switches on the left and right.
At the bottom is the DC jack that is connected to the charging rails underneath.
The PCB from top to bottom,
Xbee, Voice, Proto, Mega
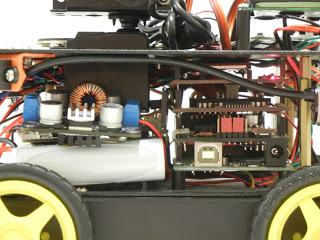
Left: shows the microcontroller battery and step-up.
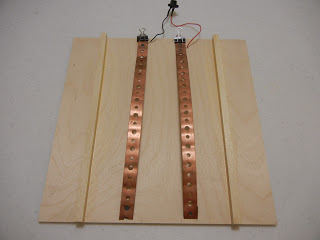
Charging dock using copper straps from the hardware store. Currently temporarily attached.
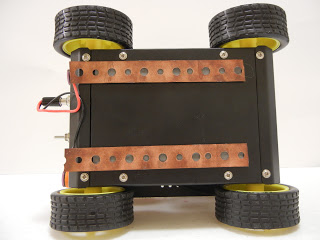
Bottom of the robot showing the copper charging straps.

Comments 4
I realized that you are using multi-cell lipo battery. However, the lipo charger on the car for dock system is designed for one cell lipo batteries. I'm also going to start building a robot for my senior project and also wanted to have charger dock and after my search i've seen your really nice robot. So i'm collecting information about batteries recently. So do you have any problem charging multicell lipo with "USB/DC Lithium Polymer battery charger" ? I'm thinking to have balance charger on robot however, I dunno how to provide IN / OUT system like the adafruit dc and other chargers do 🙁 Any suggestion ?
I bought the batteries as a set so they act as one cell. They are a matched pair so they can charge with a single cell charger. But if you out two in series to increase the voltage you will Need to balance them which I haven't looked into them yet.
I remember you are using Polymer Lithium Ion-Battery-6Ah(http://www.sparkfun.com/products/8484). But in some pictures it seems you use different. Can you also share details of the stable batteries you use ? BTW I've ordered RP5 Tracked Chassis from pololu, which has 2 dc motor and also ordered ArduMoto for playing and experimenting with it 🙂 I didn't order your chasis at first, cause its problem for me to control 4 motor, and also seen your forum posts on arduino forums. Any chance finding good and stable 4 dc motor driver board ?
I switched to these batteries, http://www.adafruit.com/products/353 Someone mentioned that you can get it cheaper like $20 but oh well at least its supporting Adafruit.
I think the motor controller I have is fine unless you replace the motors that need more current. The motor controller can do 2A per channel so that is 2 motors that have up to 2A. I don't what the issue is with turning. I have seen others that are fine. Look at this
I know he used a different motor controller that is controlled directly from the Arduino instead of Serial which was faster at sending commands.
Post a link to the chassis you used. I would like to take a look. I am open to rebuilding.
The other option is to get 2 2 channel motor controller.
I might just build a custom motor controller anyway.