
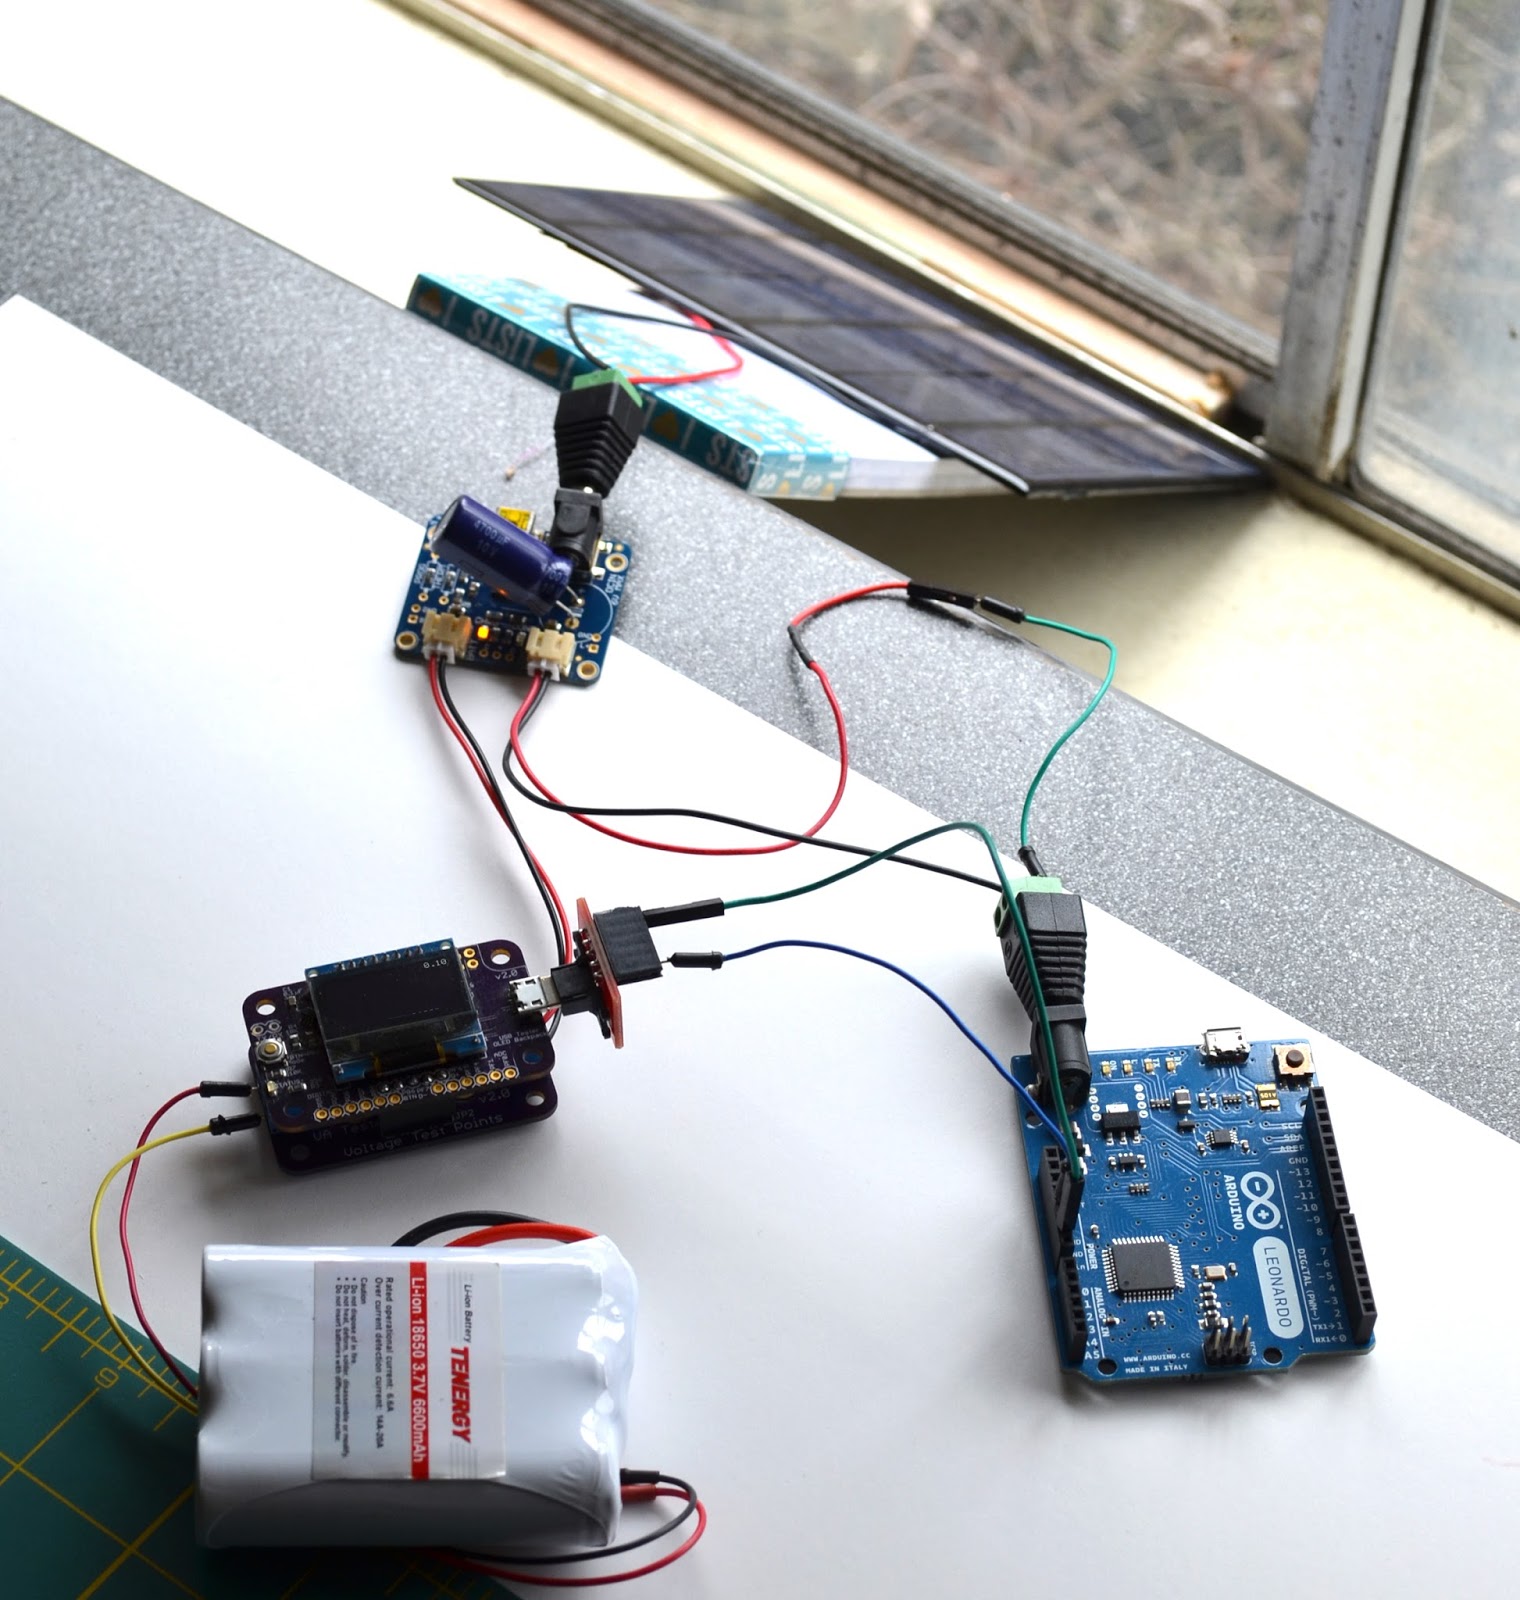
Once upon a time on a bright and sunny afternoon, I decided to interact with some photons from that big burst of energy we revolve around. I had ordered a 6V 3.5W solar panel from Amazon awhile back but I never got around to trying it. I also had an Adafruit Solar LiPo Charger that I hadn’t used. Part of this is research of using solar with home automation nodes that are near a window. Currently, I use AA batteries but I see them as wasteful since eventually you have to replace them. Of course you can get rechargeable AA batteries but they usually put out a tad less voltage, 1.2V vs 1.5V and still uses energy from an outlet to recharge. (Hmm…you could recharge them from solar?) This setup using off the shelf parts is a bit more pricey but in theory could last indefinitely on the same set of batteries. The Adafruit charger is where the magic happens. It takes care of load sharing with a 1S LiPo battery when there isn’t enough Sun and it will charge when there is enough Sun. Ideally in the end, I would design a node that incorporates this circuit but it’s really only needed for window nodes. I could create two types of nodes – one for solar and one without, or an easy add-on board to solar enable a node, hmm…
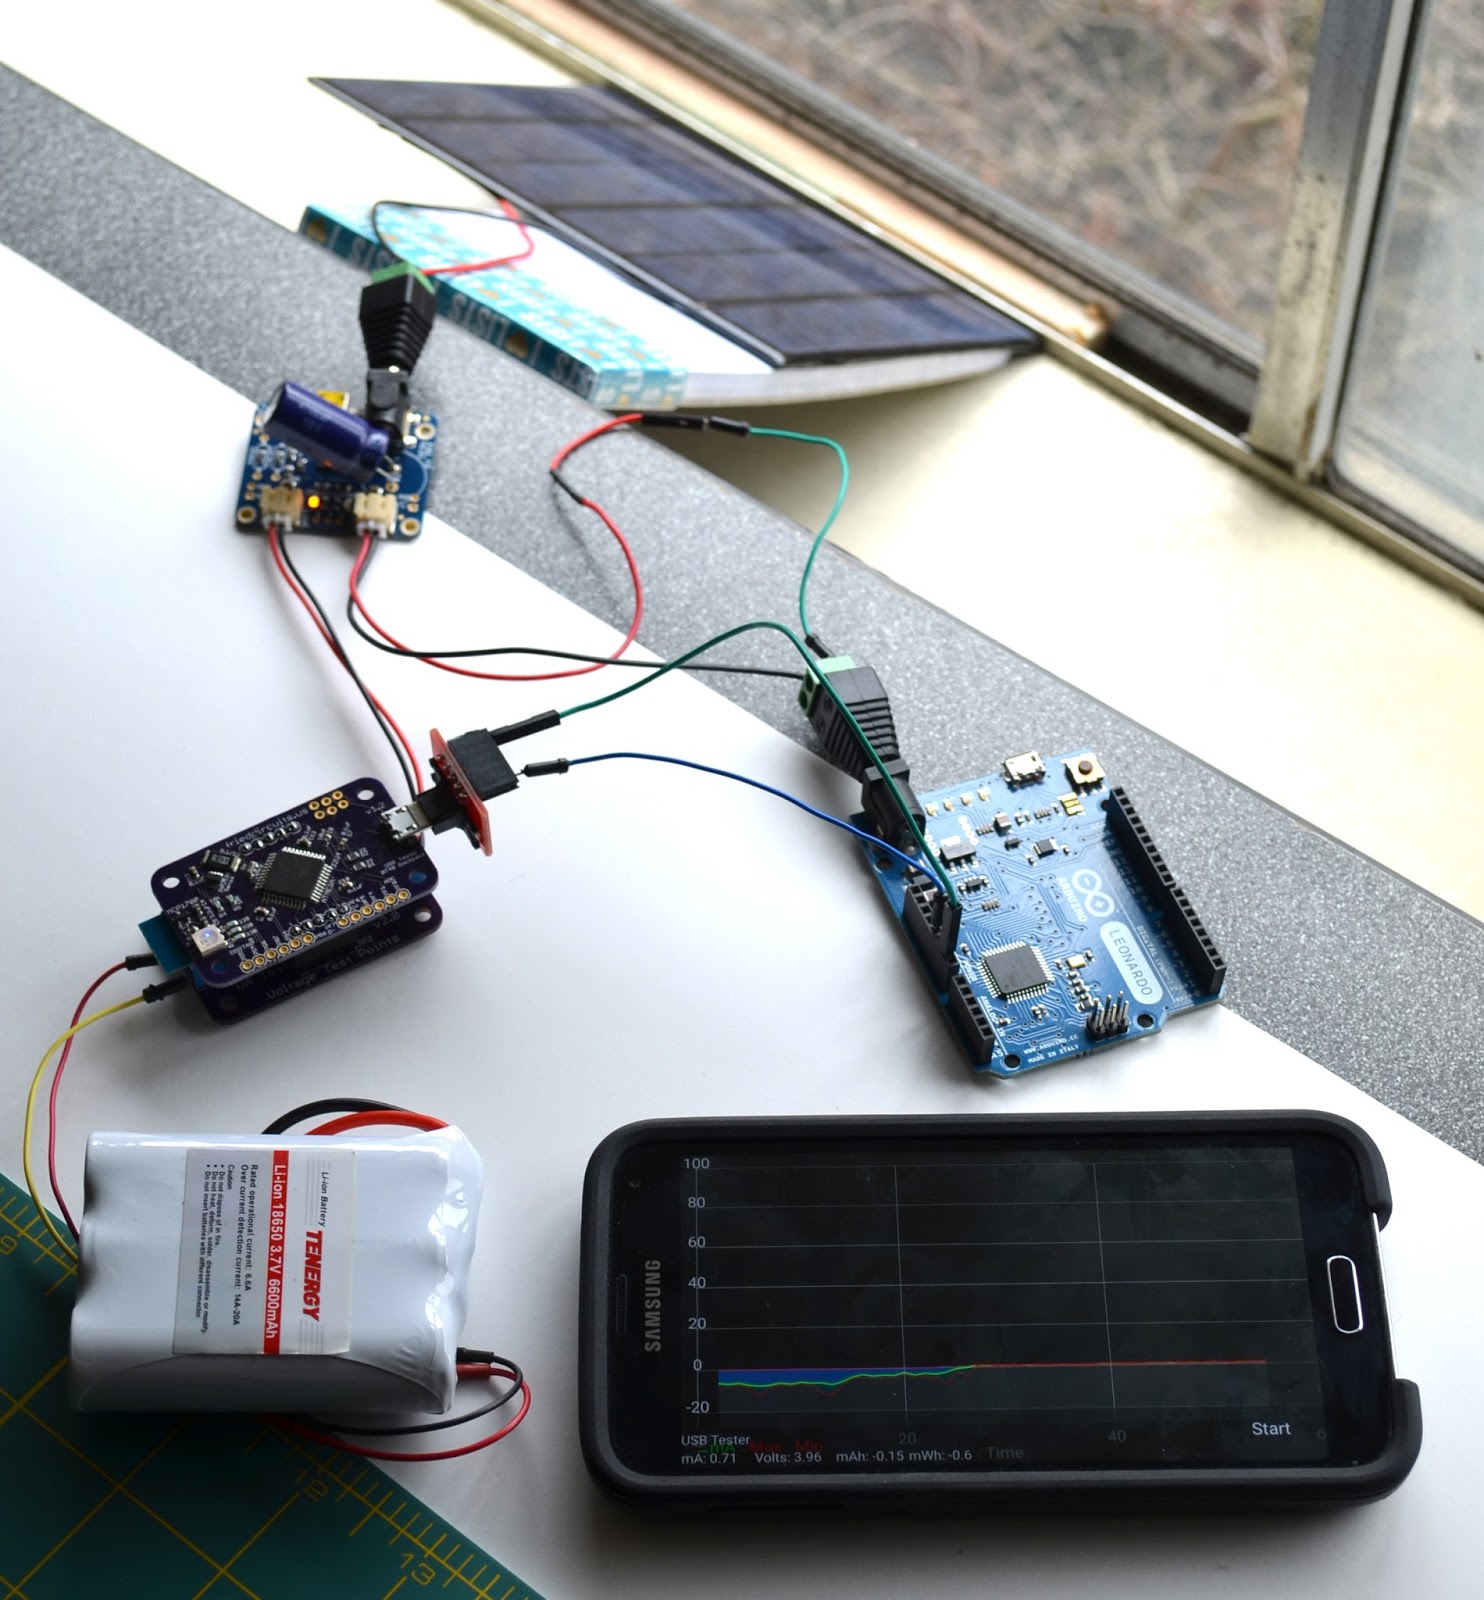
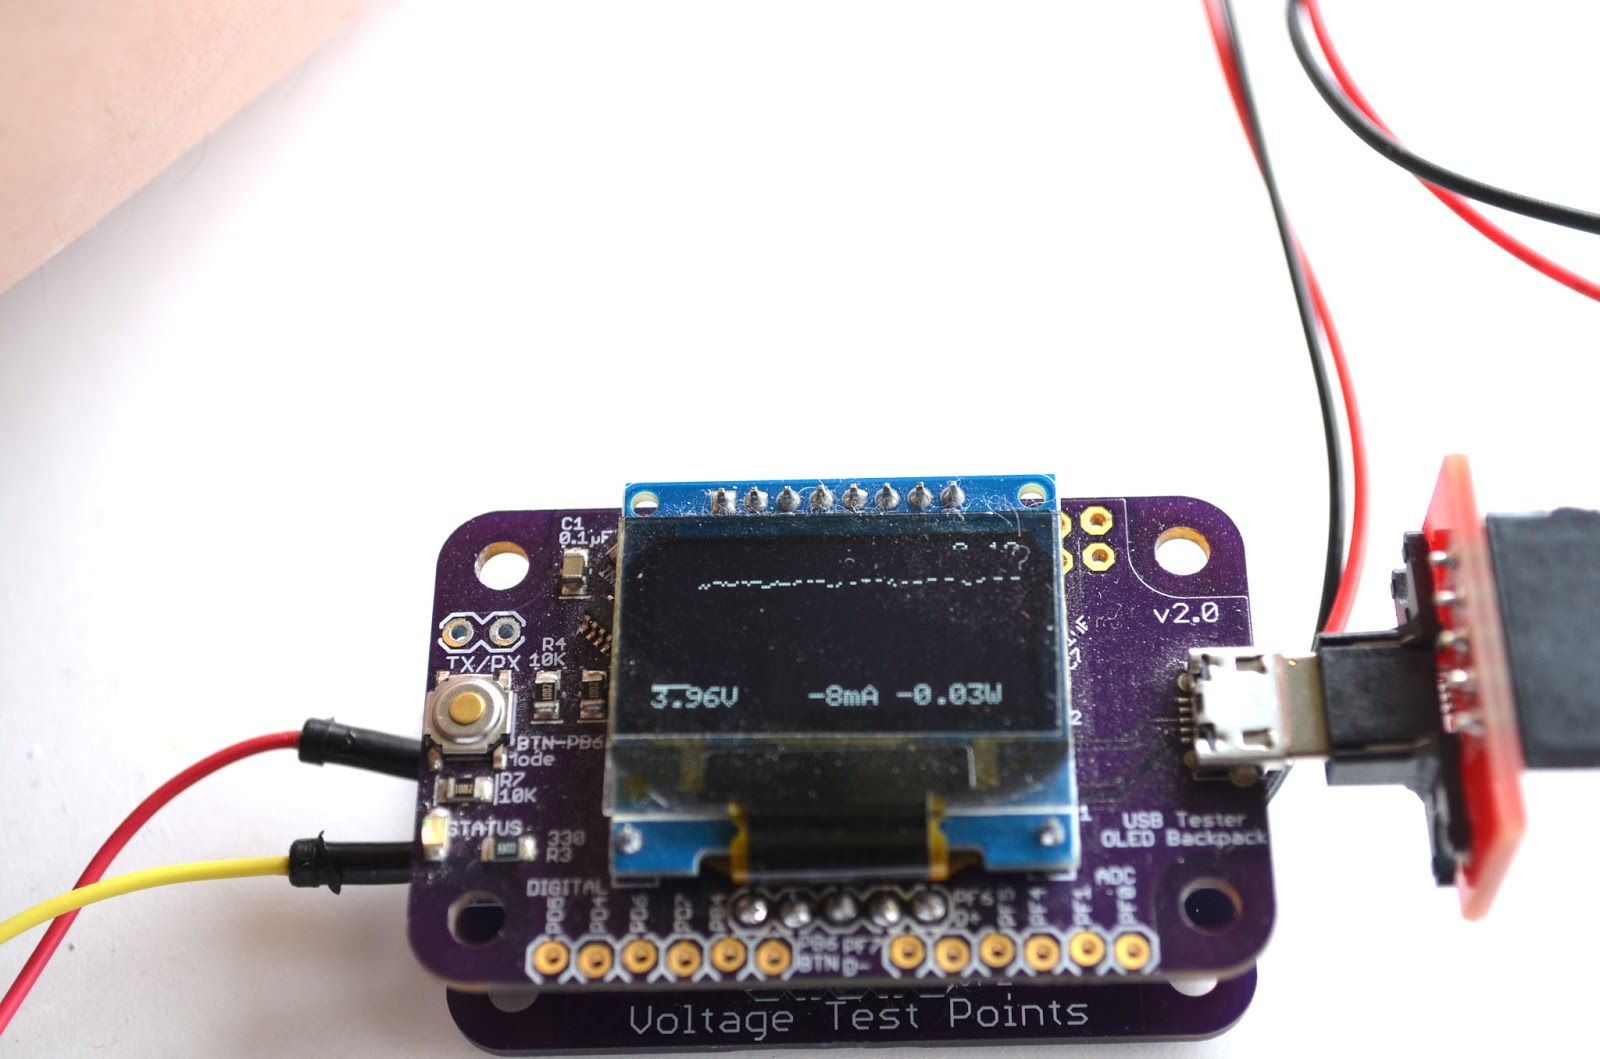
I set up measurement in two ways. First the above, where the VA Tester is inline with the load and then inline with the battery. This is where I realized a use for the ability of the INA219B sensor to measure negative current. I can now see when the solar charger is draining or charging the battery and at what rate. Pretty cool, eh?
I used an Arduino Leonardo as a load with a blink sketch and as a 5V regulator for the backpack. I also modified the blink sketch to blink rapidly ten times on boot so I could tell if power was being interrupted.
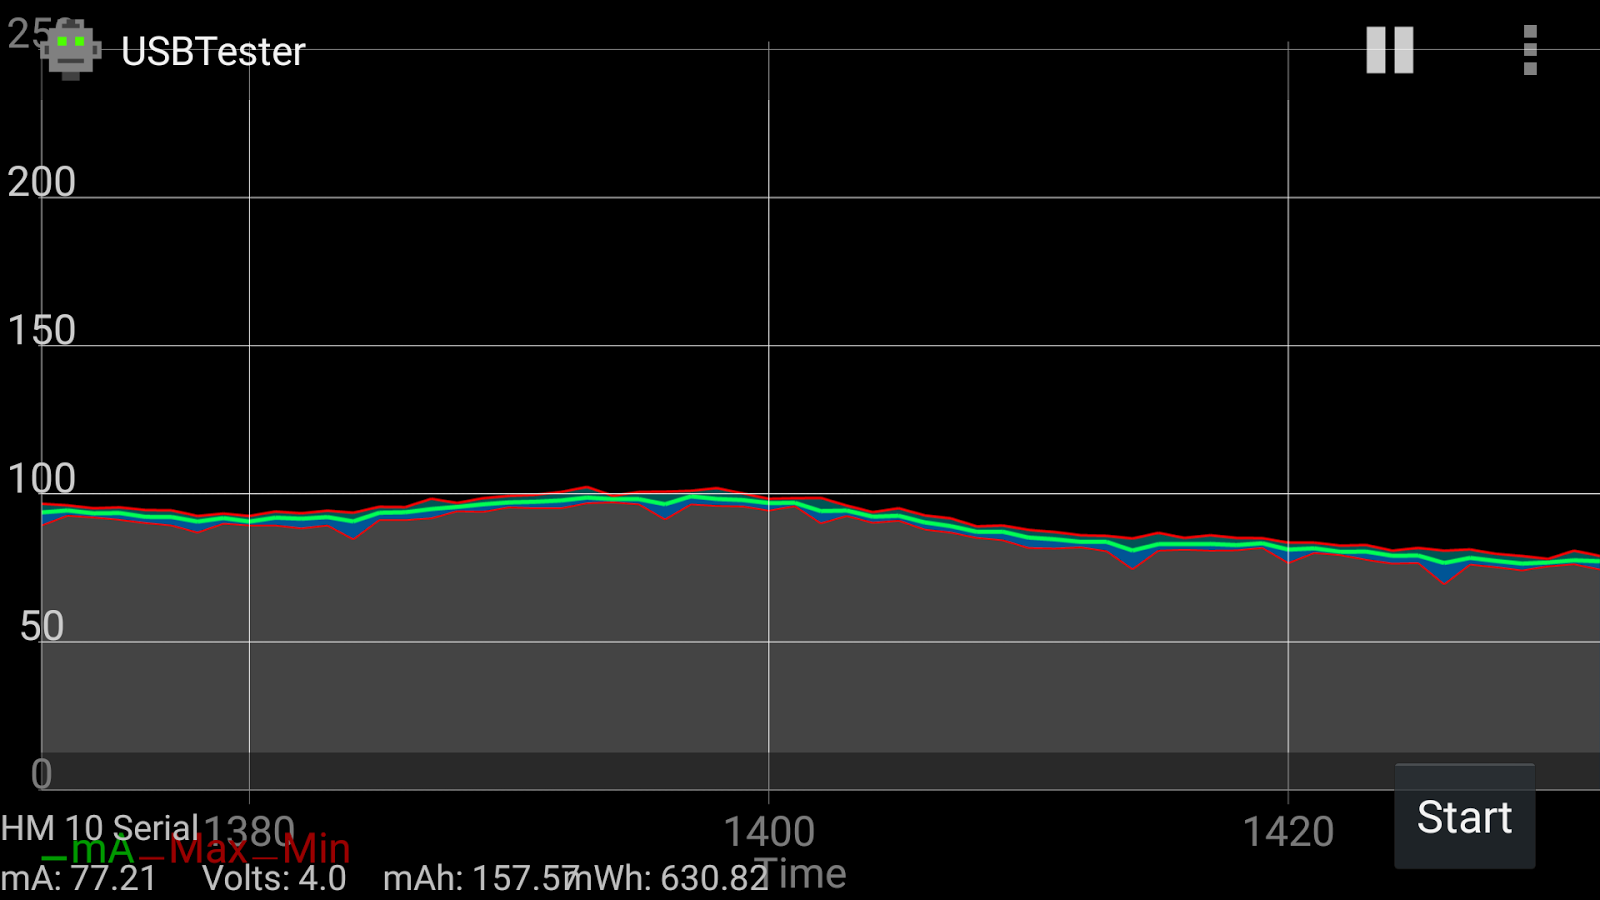
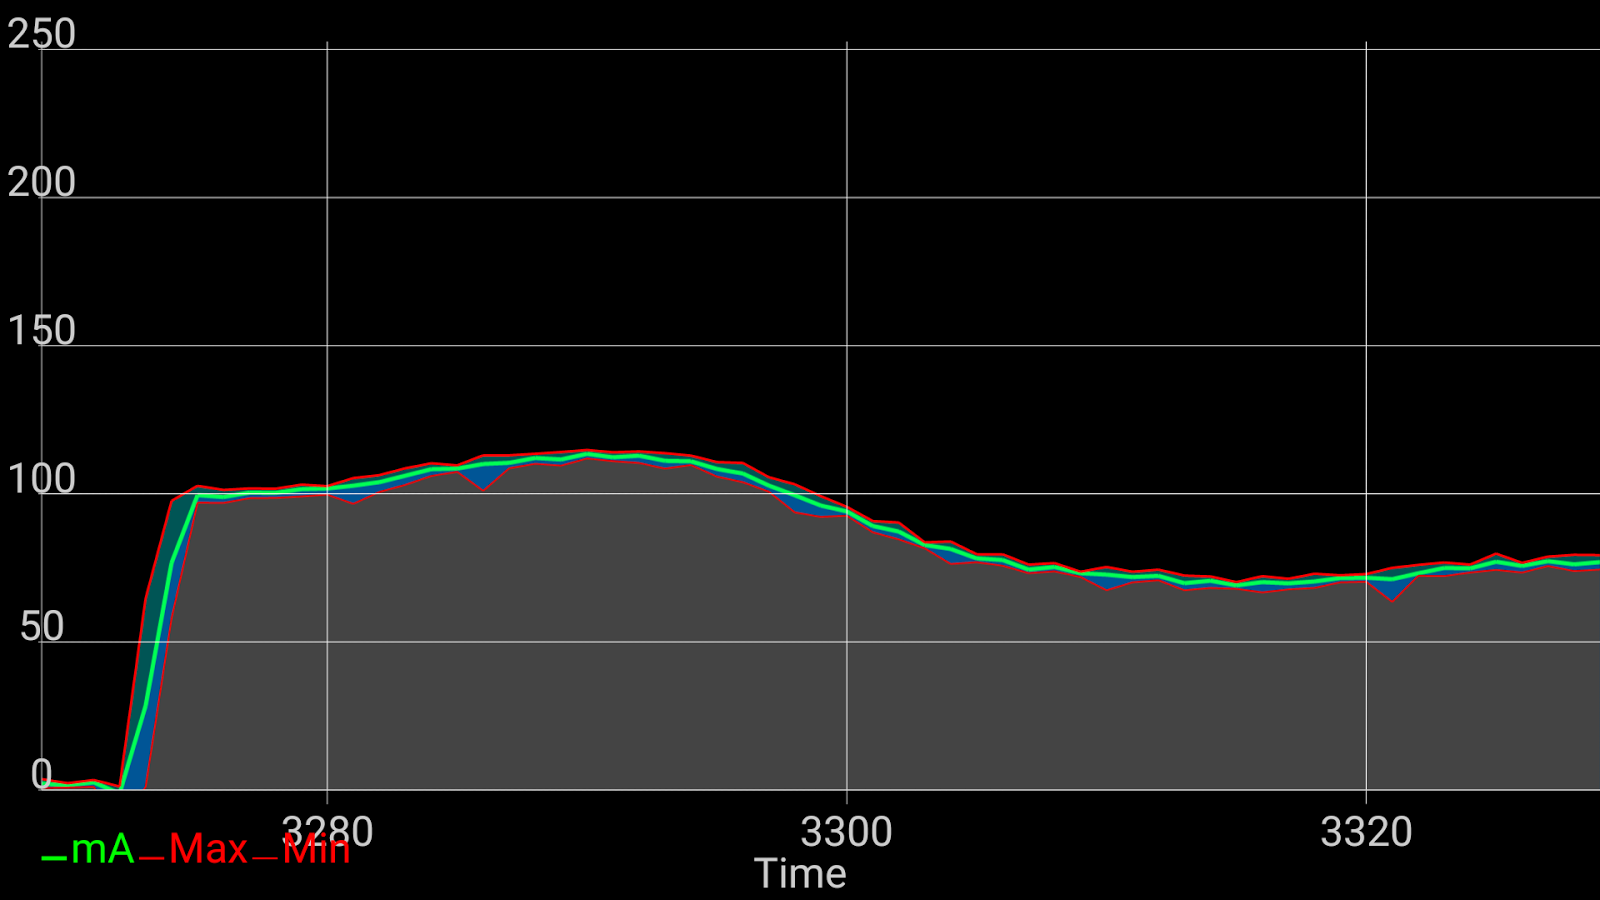
I wanted to see how the charging rate changes throughout the day without sitting there watching or having my laptop connected for logging. So this was a perfect opportunity to put the USB Tester Bluetooth backpack to use.
Here are some screenshots of monitoring the battery load throughout the afternoon. A few times I had to move the panel so that it wasn’t getting shade on the corner, as evident in one of the screenshots.
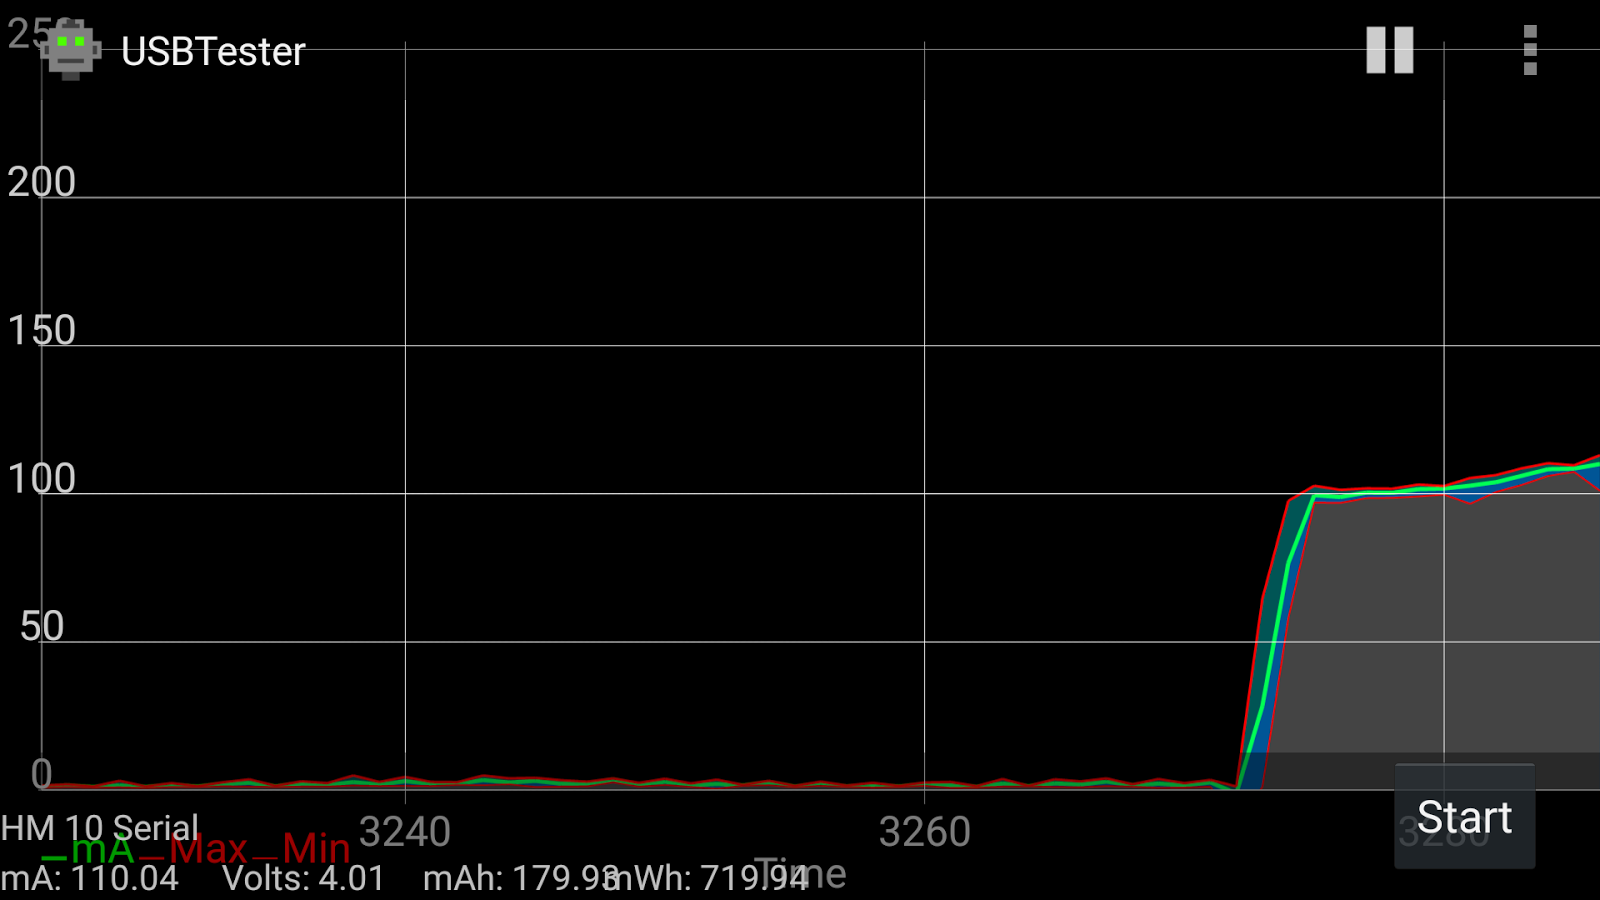
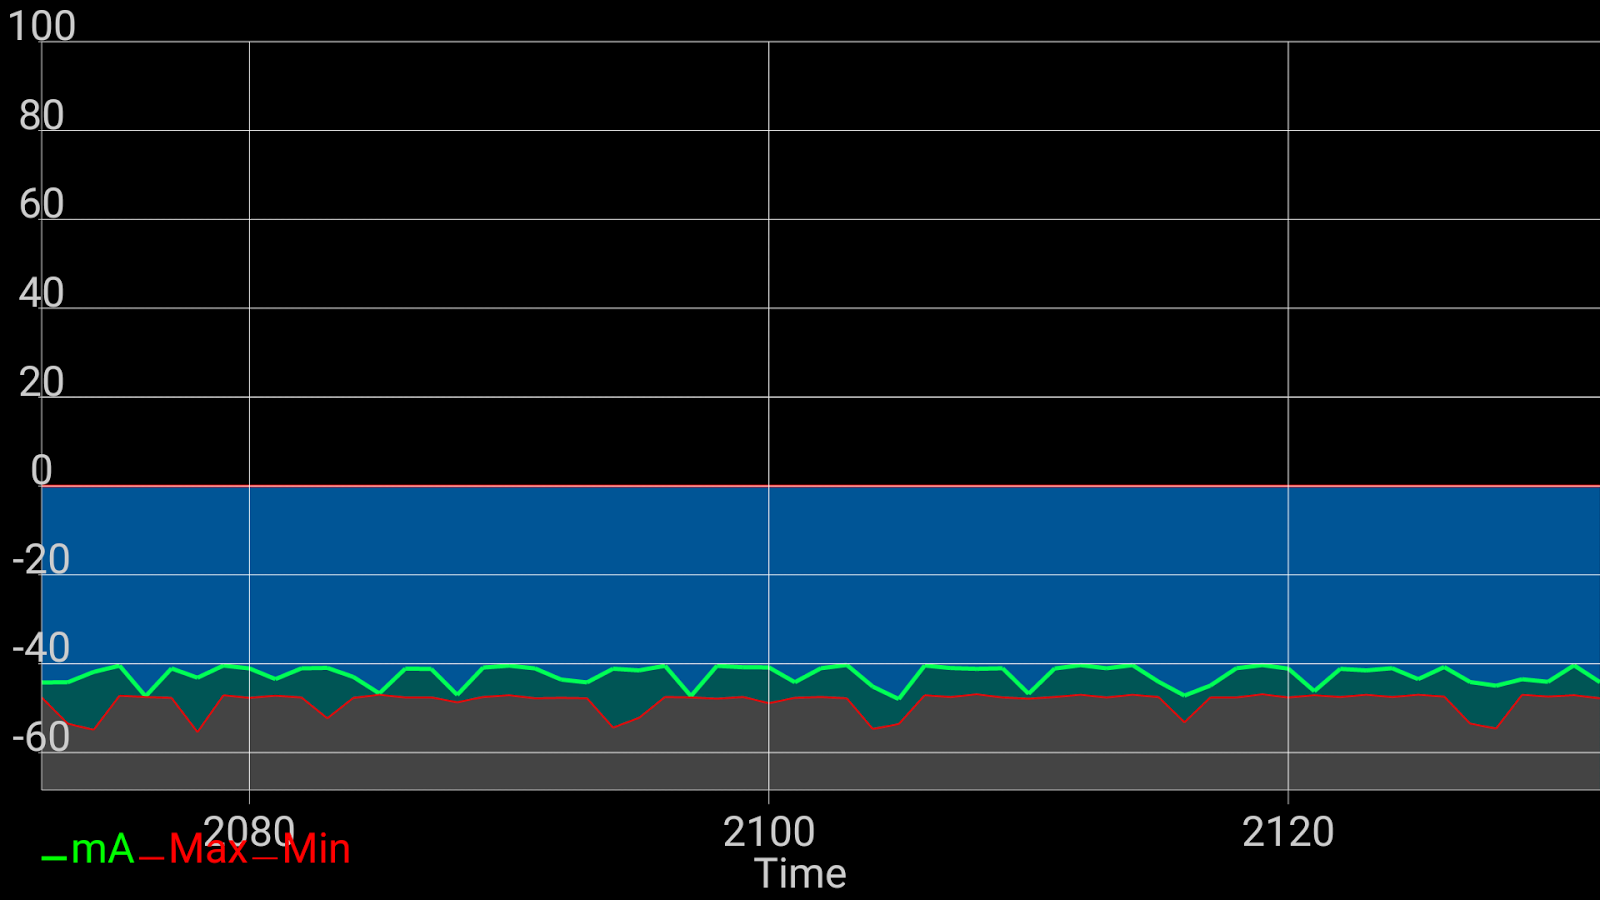
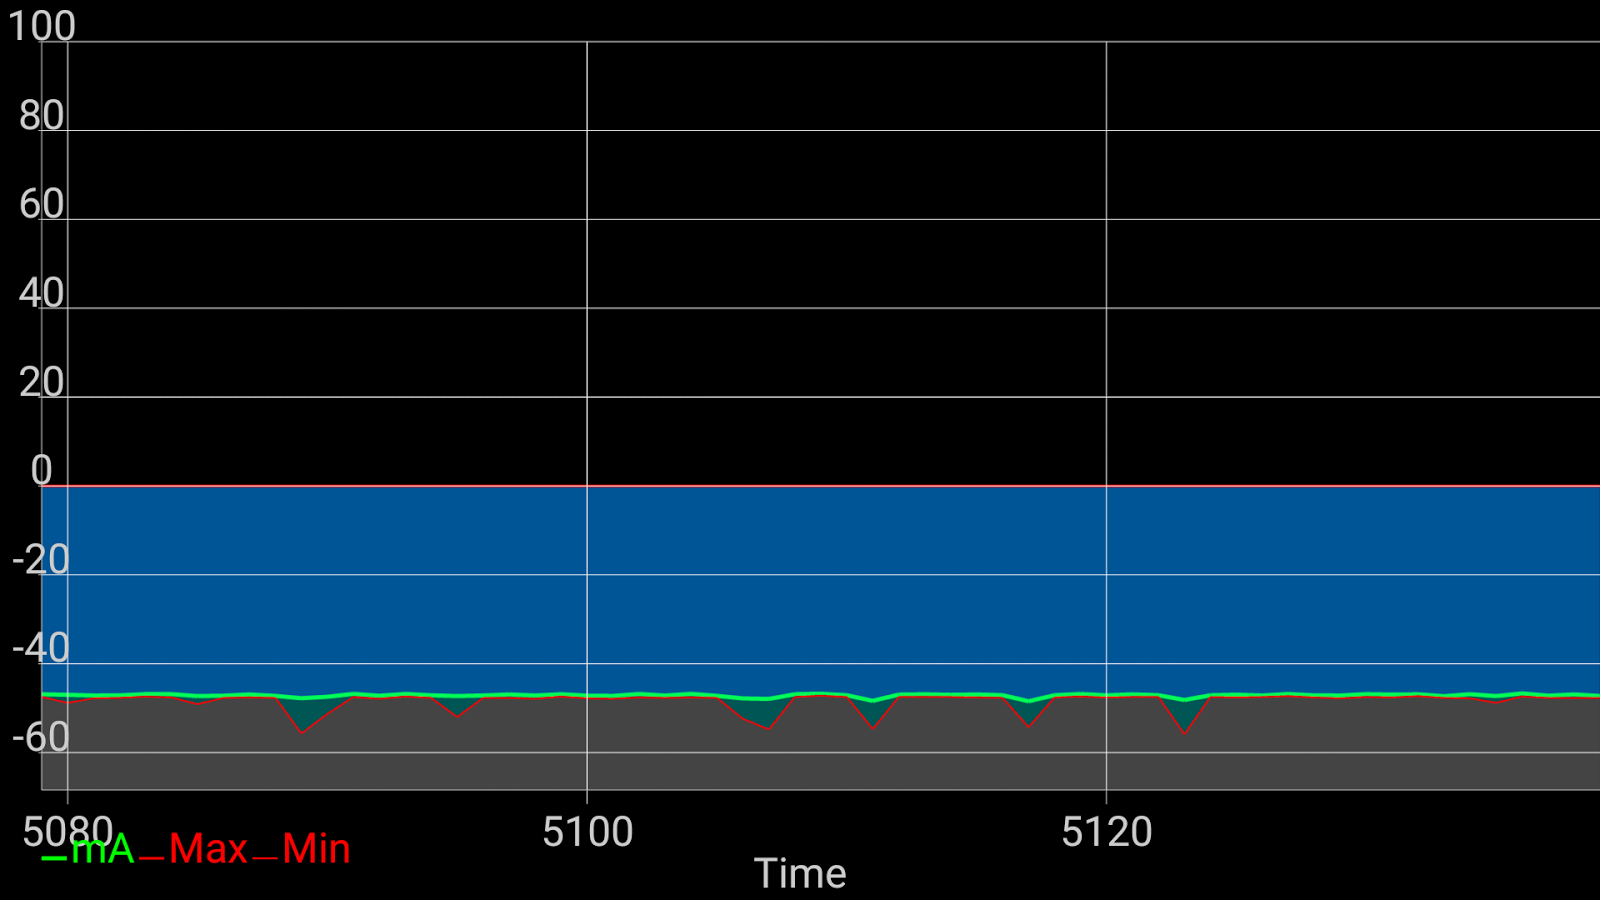
Finally the last screenshot I modified the USB Tester app to handle negative current. This will need some work before I add it to the released version. May need a firmware tweak as well since the min current after going negative is always 0.00V which doesn’t seem right to me.
I am happen with the outcome of this test and definitely will expand upon it. Time for some EagleCAD work!
Comments 3
Where can I buy the parts for this
Hi, the USB Tester and VA Tester can be found at http://friedcircuits.us
Thanks!
Forgot to mention the Bluetooth Edition isn't released yet but the app will still work with a USB OTG cable. Or you can use a desktop computer.