After completing my first Security Bot, I had come across the DFRobot 4WD platform. Once viewing some projects made with it, I was inspired for my second creation. This time around I decided to cram as many sensors into it as possible. My goal was to make this my main robot that I could continually expand upon.
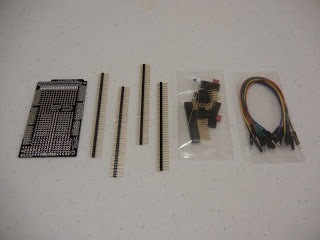
I started ordering parts in January mostly from my three favorite sites. Sparkfun, Adadruit, and now DFRobot and DSS Circuits. I also a ordered a Arduino Mega Protoshield from NKC Electronics. It turns out Adadruit sells the same board. I decided I wanted to make this one more permanent and use the protoshield and solder everything with header connections for the sensors. This makes it much cleaner and easily disassembled.
I had a few parts already and some credit from SparkFun’s free day so I decided to build it as a 2nd robot instead of a replacement of SBot 1. Having two robot leaves for some interesting possibilities later.
In order to assemble a working prototype I ended up having to borrow parts form the SBot 1 (Security Robot 1 and therefore it was inoperable for awhile. I borrowed the XBee radio, battery, and step-up converter.
I decided to use the XBee since it is faster at connecting during development. I already have a WiFi Shield from DFRobot ready to swap in soon.
Long story short, I had some power issues and ended up having to have two power systems and therefore that is why I had to borrow parts from SBot 1. During development I saw that Adafruit had some new batteries that can hold more capacity which can handle more current. So I ordered two of them which freed up the others for SBot 1, plus a spare for future projects. I love the two battery setup and things are much smoother with the new Lithium-Ion cobalt batteries. I decided I wanted to have SBot 1 running again since it makes for a great web controlled, long battery life robot. I made one more order from SparkFun for a step-up booster and a few other parts for inventory. I had a hard time finding a step-up that can handle more than an Amp. The SparkFun step-up will have to work for now since it is just enough that can sometimes power the camera. The original step-ups were from an eBay seller in India but they no longer have them listed. I might have to contact him again or design my own for my final design. With the step-up along with the WiFi Shield, SBot 1 is back in service. Later I will swap the radios.
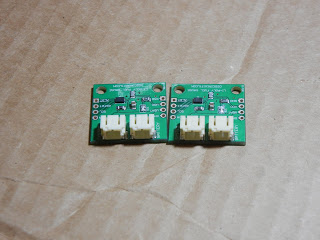
As ideas come to mind and once I add new features to SBot 2, I will be sure to post them here. The last few recent upgrades other than the batteries were two I2C Fuel Gauges from DSS Circuits and a Real Time Clock from SparkFun.
The reason for the RTC came about in trying to optimize SBot 2 to poll the distance sensors faster. I realized some of the sensors don’t need to update every cycle. So after a lot of learning and struggling I got the RTC working where it triggers an interrupt every minute to update the non essential sensors. This sped up polling a lot. The RTC will allow for other possibilities down the road as well.
Originally I was going to use voltage dividers to monitor the batteries like I did with SBot 1. For some reason on SBot 2, they were way off and pretty much useless. I think it had to do with having two power systems and trying to monitor them both from the MCU. I came across an article from Hack-A-Day that lead me to DSS Circuits. This site is great as they bring some of the newer IC’s to the DIYer. Prefect he has a Fuel Gauge that solves my problem. They are I2C and return a percentage of the batter left. I ordered three of them, two for SBot 2 and one for SBot 1, which I haven’t installed yet.
I did run into a problem with being unable to change the I2C address on the Fuel Gauge which until now I had to use a soft I2C. Today, DSS Circuits posted a new product to multiplex I2C devices. Perfect!
Now onto the good stuff…
Here are a list of parts that I have used so far (well, most of the parts):
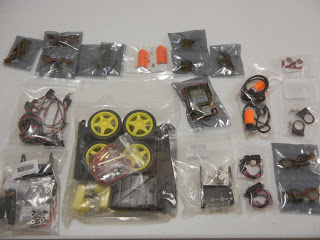
First order of parts from DFRobot.com. 4WD platform, IR switches, IR distanace sensors, line sensors, Ultrasonic sensor, WiFi Shield, pan/tilt brackets/servos, and miscellaneous cables and brackets.
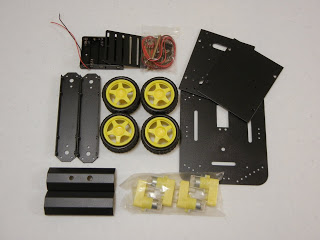
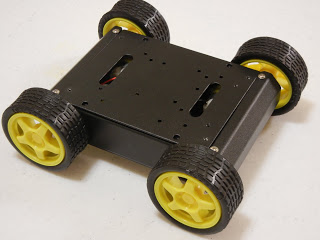
DFRobot 4WD Robot Platform. Still need to order wheel encoders.
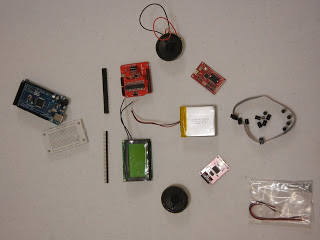
Order from SparkFun which I used my free money from Free day. Includes SpeakJet/TTS/Speakers, LCD, battery, serial motor controller, ICSP pocket programmer, and Arduino Mega 2560.
Fuel Gauges from DSS Circuits.
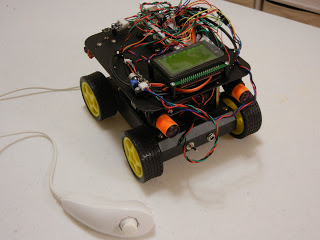
Here are some pictures of the build and how it looks now. (Final pictures and videos to come)
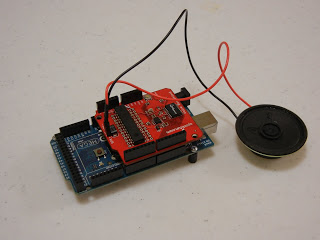
Testing the Voice Shield with TTS soldered on already.
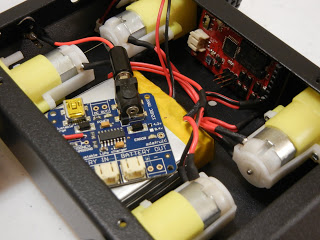
Internals of the base with original battery, serial motor controller, Adafruit charger and 4 DC motors.
Assembled robot base.
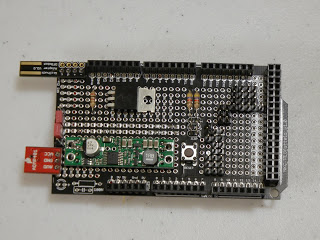
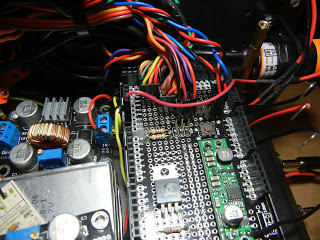
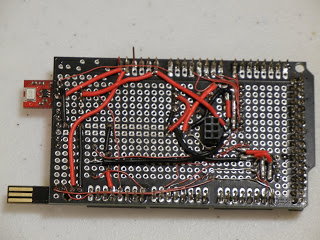 Completed protoshield. I have added to it since.
Shows the 5v regulator from Polulu and TIP120 to control power to the camera. The top left is the Wii Nunchuck connection and the bottom is a MEMS microphone.
Bottom side of protoshield. I tried to make it as clean as possible.I kind of just designed it as I added to it. I wanted to make sure that everything can be disconnected for easy modification and repair.
Top level of robot during testing. Showing the original microphone I was using and the Temp/Humidity sensor the left.
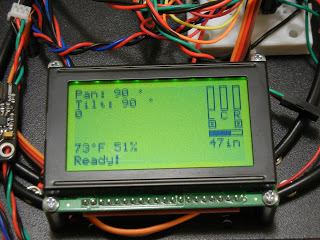
LCD sensor output.
Initial test of robot.
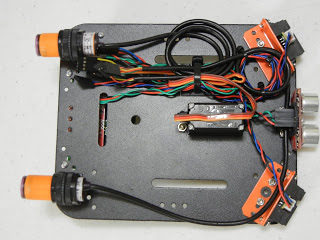
Underside of top level. Shows the two rear IR switches and front IR distance sensors. In the middle is the pan servo for the camera.
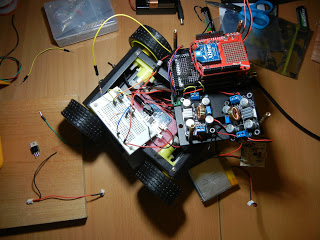
Some testing after adding a 2nd battery. This shows the two step-up’s and the shields. Starting from top, Xbee, Voice, Protoshield, and Mega.
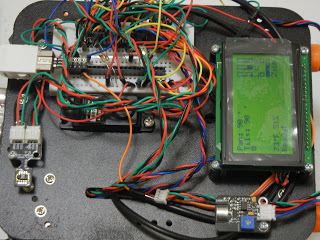
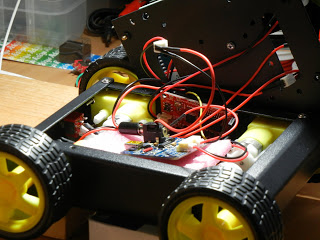
Internals with wired connections.
Sensor connections to the protoshield.

Comments 6
So, if your robot detects an intruder, how does it inform you? It seems that it would be nice to have a cell phone included, so the bot could alert you and send video.
Nice project! Might I inquire the build cost so far? Also, I don't see the camera in any of the photo's, is it not mounted yet? How do you plan to gather the video feed, record to some sort of onboard storage or stream wirelessly to a PC for storage or real time internet viewing? I read in your previous blogs that you attempted tethering to the internet on your last security bot, do you plan to do this again, if so might I suggest making a smart phone app that streams the video and allows real time control, that would be difficult would add +50 to the cool factor.
I haven't posted a picture of the current build. I will post some current picture soon that shows the camera and charging dock.
@WildZBill
Currently it only be wit the camera but I am looking into other sensors such as PIR.
@Bob
I am not sure about the build cost but I can add it up in a bit and post it. Its probably $500+ since I kept the other intact.
The robot has a camera on board which uses a 900hmz radio and then my computer can do the processing. I have made a ASP.Net4 website that has robot controls and video feeds. Also has a charging dock camera for docking. I can post some screenshots of that as well.
I thought about a app but the website will work on any device. I might do an app just for the experience.
Now that most of the hardware is how I want it minus a few things the possibilities I can do with code is endless. I want to look in to real time video processing.
I have some questions 😉
source code?
what do you use for detecting intruders?
how are you preventing it from detecting you as an intruder?
is it autonomous and does it have dynamic path building (reroute itself if something block it's path)?
what do you use for control?
and again source code?
Currently I am not ready to post my source code as it needs a lot of work, unless someone wants to help with it. I haven't been able to work on any sort of detecting people and being autonomous. I need to solve my turning problem first. I am working on SBot 1 so I can complete it and then solve this turning problem.
Currently I use and Xbee to my server and run a aspx webiste to control it over serial. Final version will have a WiFi shield and be controlled directly via IP.
Greetings from hackaday! Neat stuff