
Now that the relay works we can do the final wiring. Read part 1 and part 2 to see how we got here. It’s been a rabbit hole for sure, but don’t fret, we are on our way out! Compared to everything else, the wiring is the easiest part. The fireplace uses a simple switch to control it as it is a millivolt system which generates its own power (from the heat of the pilot) to trigger the gas valve. Ripe for hacking. In the end for safety (and for long term vacancies), I decided to wire the local override switch as a hard disable. That way if we are gone for the weekend or during the Summer months, I can disable it. Just in case there is a network glitch or something the fireplace can’t turn on even if the relay does. Turns out this is also useful during testing of the rules so the fireplace isn’t turning on and off consistently.
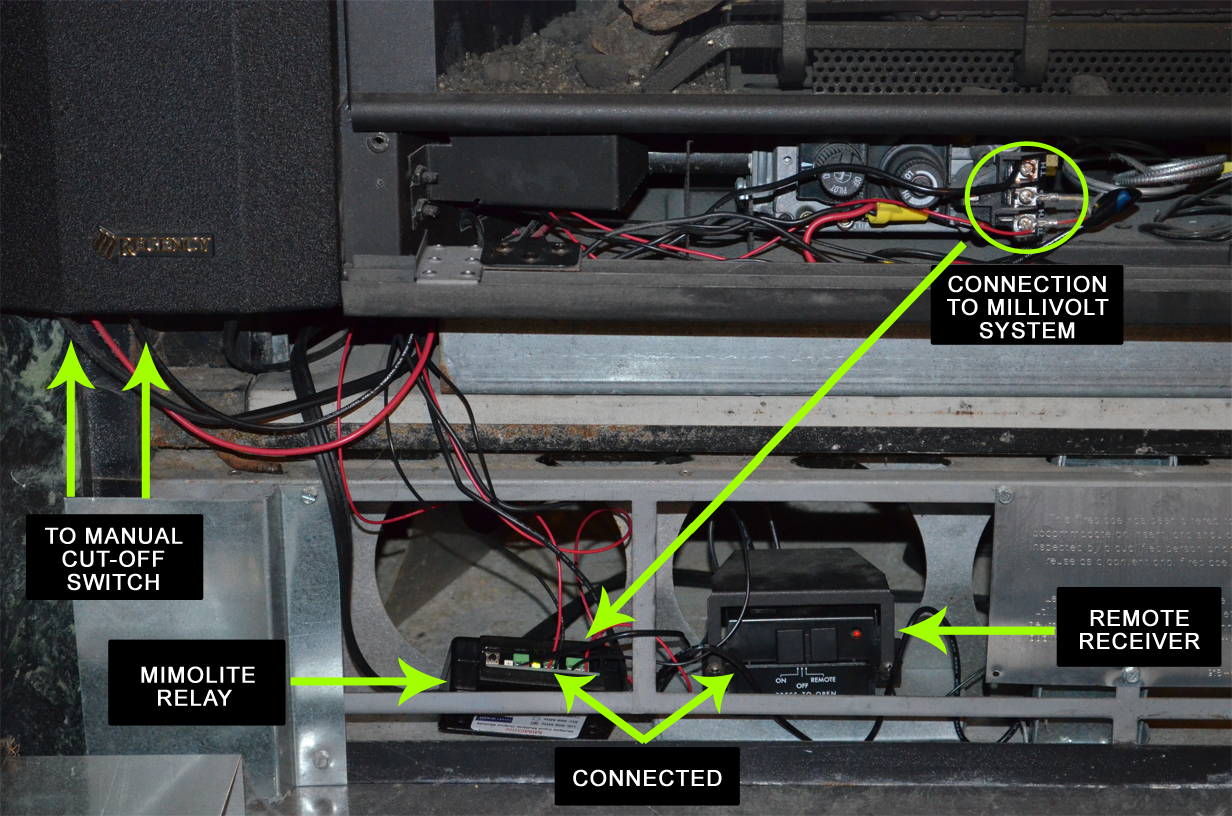
Basically the connections are one side of the fireplace switch connection goes parallel with the side switch then to the relay negative. Then the positive of the relay is direct to the fireplace. Then the original receiver is wired to the relay ADC input.
Simple. I used some electrical tape just so I can easily remove it, this being an apartment and all. Now we can close oFf the fireplace and play with openHAB.