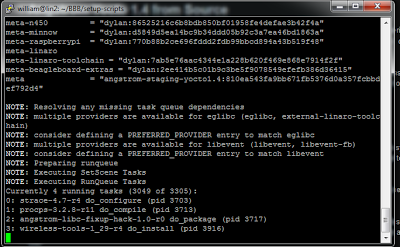
Going down the ROS road has been a long one. Full of hair pulling (if I had any) but also a huge learning experience now that it is working. Due to some of the requirements for mjpeg-server I had to compile Angstrom from source so that I can use the branch for Yocto 1.4. In turn this has lead to having to compile other components like the WiFi driver.
Compiling from source isn’t too bad as it uses the same Bitbake process used for recipes. The hard part is flashing the SD Card and then flashing the eMMC. I am not sure if I did it the “correct” way but in the end it worked. This is how I did it…
Compiling
The Angstrom page shows the basics to get going compiling. The end of step two shows how to compile the system image. I ended up using the “console-image” so that it is as small as possible. Then I can add the packages I need to run ROS since the factory image eats up most of the eMMC. After flashing this image I had less than 20% used.
When git cloning setup-scripts make sure and switch to the Yocto 1.4 branch before running anything if you need that version.
 |
| Bitbake console-image Angstrom Yocto1.4 |
Flashing SD Card
This is much easier using Linux so I used a Ubuntu VM. Using a SD Card already flashed with the eMMC Flasher image, found here: http://beagleboard.org/latest-images, it was just a matter of mounting it in Ubuntu and copying the boot and system files over.
These steps can also be done in the GUI with drag and drop. The names of the mounted partitions on the SD Card may be different in your case. You can look at each and figure out which is which.
In my case:
- Boot is BEAGLE_BONE
- System is eMMC_Flasher
- Once the SD Card is mounted in Ubuntu go to
- setup-scripts/deploy/eglibc/images/beaglebone
Copying Boot files
- cp uImage* /media/BEAGLE_BONE/uImage
- cp MLO* /media/BEAGLE_BONE/MLO
- cp u-boot* /media/BEAGLE_BONE/u-boot.img
- The uEnv.txt file should have one line with: optargs=quiet
- Update the ID.TXT for the version you are running (optional)
Copying System Files
- delete all files in /media/eMMC_Flasher
- rm -rf /media/eMMC_Flasher
- extract system systemd-image-beaglebone.tar.xz (Depends which system you compiled)
- tar xvjf systemd-image-beaglebone.tar.xz .
- copy to the root of /media/eMMC_Flasher
- cd system
- cp -r * /media/eMMC_Flasher
Flashing eMMC
This part is a little tricky. I had to do it twice because the first time I copied to the wrong partition. When you start the Beaglebone with the SD Card inserted it will boot from it and run the live system. You can make changes and tweak it as needed before copying it to the eMMC.
I did this awhile ago but this is basically what I did. Just double check everything.
Copy Boot files
Basically this mounts the eMMC boot, deletes everything and copies the boot files from the SD card to the eMMC.
- cd /mnt
- mkdir boot
- mount /dev/mmcblk1p2 boot
- cp /boot/* /mnt/boot
- umount boot
- rmdir boot
Note: I went back and I don’t see all the boot files on the eMMC/boot so but I am pretty sure this is how I did it. So your mileage may vary. But this should at least point you in the right direction.
Copy system files over.
Basically this mounts the eMMC root, deletes everything and copies the root files from the SD card to the eMMC.
- cd /mnt
- mkdir root
- mount /dev/mmcblk1p1 root
- rm -rf /mnt/root
- cp -r / /mnt/root
Finally power off, remove SD Card, and power up. Now you should be running from the eMMC with the freshly built Angstrom image.
Now that it is all working I may release a ROS BBB Image that someone can flash and be ready to roll with ROS. I would like to figure out how the eMMC Flasher script works and have it auto flash.
Here is the sites I used for research to figure all this out:
http://cwraig.id.au/?p=507
http://www.meadios.com/2012/01/building-angstrom-using-bitbake-and-openembedded/
http://www.adminempire.com/how-to-install-arch-linux-on-beaglebone-black-bbb/
