For a long time now I have been wanting to dabble in home automation but didn’t have the avenue to design a system. After becoming familiar with microcontrollers over the last two years I have been mentally designing a system starting with a smart outlet. Recently, before the Maker Faire I was talking with a friend and having seen a few blog posts about some projects in the home automation field I decided to move forward. I now have sometime to work on this in between other projects, mainly waiting for some parts for my new Sbot 2 redesign. With some SparkFun gift card money I decided to pull the trigger and order some parts. I decided to build a 1 channel/plug smart outlet. This would be enough to develop a proof of concept and start to design a software framework. The parts arrived the weekend before the Maker Faire. Boy was I excited to get this project off the ground!
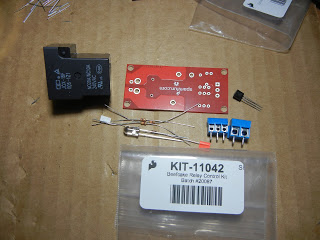 |
| Sparkfun Beefcake relay |
Starting small, I wanted just a smart outlet with basic operation and then see what I can do with it. Once it’s completed then I can design a PCB and make enough units for the whole house. This will give me a basis to grow the project into a complete home automation system.
Here is a list of parts:
Relay Board
BeefCake Relay: http://www.sparkfun.com/products/11042
Xbee:
Xbee Series 1: http://www.sparkfun.com/products/8665 (Already had)
Xbee Explorer: http://www.sparkfun.com/products/9132
Current Sensor
ACS714 30A: http://www.pololu.com/catalog/product/1187 (Already had)
Atmega Lte
http://gizmosusa.com/?p=19 (Already had)
Mains Outlet (Already had)
RadioShack:
http://www.radioshack.com/product/index.jsp?productId=3118987 (LED Switch for MAINS)
http://www.radioshack.com/product/index.jsp?productId=2062282 (Enclosure)
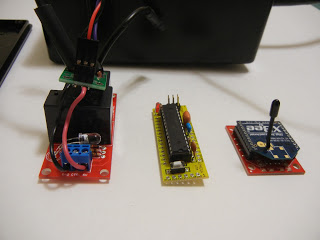 |
| Left to Right BeefCake with ACS714 current sensor on top Atmega Lite Sparkfun Explorer with Xbee Series 1 |
5v Power Supply
I ended up using a D-Link power supply from a WiFi access point. I removed it from the casing and embedded it directly into the outlet. I will probably end up designing one for the final design but this will work for now.
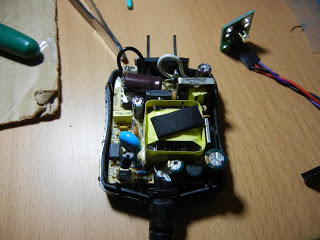 |
| D-Link 5V 2.5A donor power supply |
Outlet – Weekend 1
My first weekend consisted of just getting the hardware together and mounted. I spent Saturday drilling, cutting, and mounting all of the parts in the enclosure. I think I spent more time deciding placement of parts then actually putting it all together.
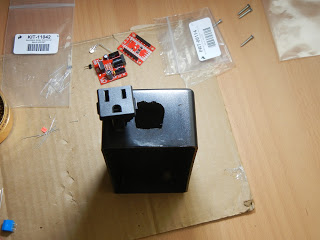 |
| Outlet |
 |
| Main power switch |
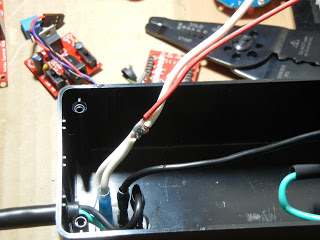 |
| Attempting to solder mains |
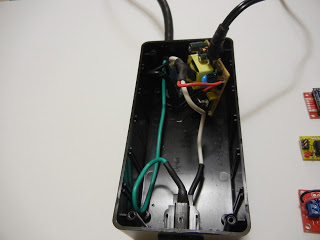 |
| Mains wired with 5V power supply |
After many hours of assembly by Sunday afternoon it was complete.
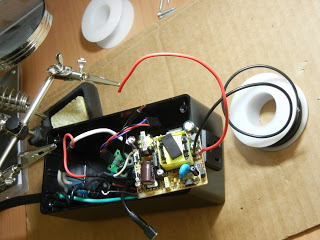 |
| Almost completed |
Software
Time to find out if all of my hours of work have led up to a working prototype. I like to reuse code from my other projects and like most Arduino projects, it needs user input. My getMessage() I tend to reuse a lot. After coyping that and replacing the command function with 2 commands, I was ready to upload and test.
…
Sending command…
…
It works!
A few days/weeks after Maker Faire…
Website
As with most of my projects it has to be web controlled via a web page. This way I can send commands from any browser or device. Much better than writing specific apps. In this case I just added a tab to the existing robot web site.
 |
| Website control |
Voice Control
What is a smart outlet without voice control? Imagine coming in the door with your hands full of groceries and being able to turn the light on with voice? That is my goal, at least in theory. How well it works is another story. I hope to get to that point. In the mean time, armed with a webcam/microphone and SAPI 5.3 in VB.NET 4, I was able to whip something up.
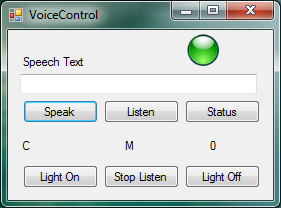 |
| Voice Control Application – Made In Visual Studio 2010 VB.Net |
Add some fussing, I was able to get it working decently. What I ended up doing is listing for a keyword and then loading a limited grammar array with just the commands available. Then after the command is processed unload the limited command list and listen for the keyword.
Now I will need to find a good microphone for the room that can pickup voice and not any background noise. Anyone have any suggestions?
Sensors:
Since these “smart outlets” are going to be throughout the house why not double as a mini sensor node, plus this could add more automated features based on sensor input.
In the initial build I included the current sensor but two weekends ago I decided to add two more.
Light – Photocell
Temperature – Thermresistor
After wiring them up (which took forever), I grabbed the code from Sbot 1 rebuild. The light and temperature sensor worked great at first try.
As for the current sensor, I am still trying to figure that one out. I never had it working well when it was on Sbot 2, but I hadn’t spent that much time on it. It was just displaying raw data. In this case I need to convert that to usable data and average over time to figure out power usage.
Next
What is next? Where will this project take me? For now I think it will be about getting the core functionality working before I move forward. After that only time will tell.
What features would you like to see?
